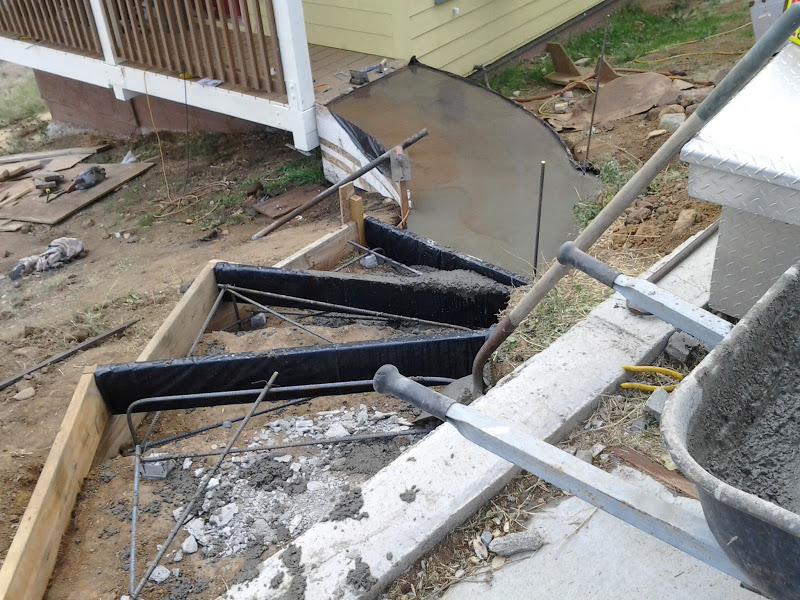
Here's the difficulty---I wanted the bridge to curve, going uphill, on an off-camber slope. So I started by digging two footings down to the hardpan, at angles to each other. I poured concrete in those with lots of rebar and bent rebar from one to the other so the finished bridge would be well anchored. then I figured out the midpoint between the two and put a 40" board on the ground there, and dug it in and wedged it until it was level. Then my forms were built from each footing to that board. The 'joists' were in first, then the form boards on top were just set on them (with angles ripped so they'd fit tight like a barrel) Then I scribed a line on those that followed the curve I wanted, cut them and screwed them down---with screws just long enough so they wouldn't move. I knew I'd have to demolish my forms from underneath so shorter screws made sense.

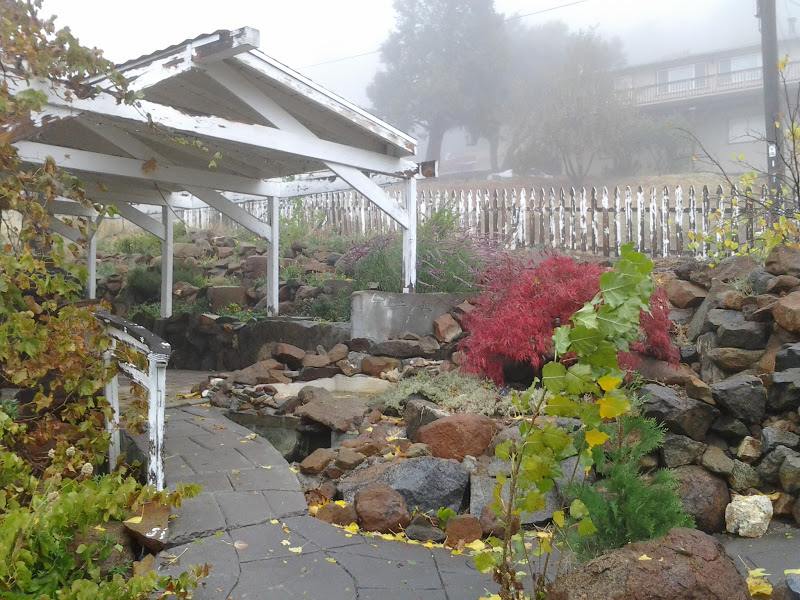

The rain didn't ruin anything---it just made the surface rough, not a bad thing for a foot path. You can see the color mixed in so it'll match the hearth inside. Although I milked it with AnnaMarie, it was actually great weather to mix concrete in----hot and dry is far worse, lugging 90# sacks of concrete, breathing the dust, and misting the stuff that's already mixed so it doesn't dehydrate too fast.
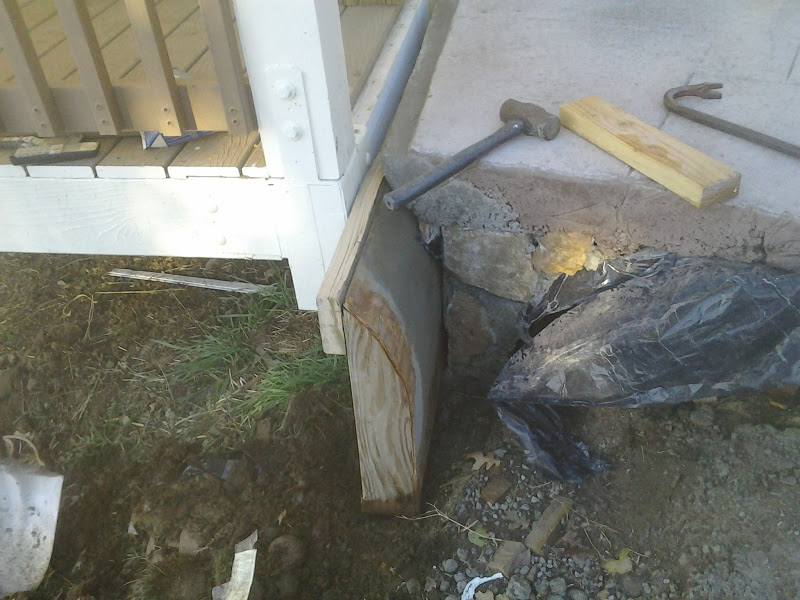
So this is stripping the forms. This one was pinned to the ground with lag bolts pounded in from under the deck. Wedges from underneath kept it off the beam, and that 2x6 screwed from the top kept it away too. You can see how the deck board will drop right in there. It's a smooth transition from concrete to deck. After pulling the pins out, it just got pounded out from the other side. The main bridge form, I just kept whacking the joists to smithereens with the digging bar. Once one form board came out the rest just fell. (The whole thing was lined with plastic for a smooth finish and to help with this stage)


2 comments:
you are an artist.
Thanks, Timmer---Today is the big day. Like a final exam. The inspector looks at everything and decides whether or not I've built a habitable structure. Sometimes they walk in, sign everything and leave. Sometimes they spend hours looking at every little thing. Either way I think I'm ready
Post a Comment