Got the final inspection for AnnaMarie's cottage today. I was at work but AnaMarie knew what to tell him....there are still a few little things, like the trench for the phone line and checking all the propane appliances but it is as of now a legally habitable structure.
It's in AnnaMarie's name. It's hers to do whatever she wants with. She's decorating right now---I haven't seen her this excited in a long time. Late last night I prematurely moved all the furniture in (you're not supposed to before the final but now she can start placing all her treasures whe's been accumulating around)
The first place we built, I put a lot of effort making it my idea of the perfect cabin for that space. I learned lots about what my style is. So the challenge this time was to pull out of AnnaMarie what HER idea of the perfect place is. It took awhile before she was able to picture things, and not just say what she thought I wanted to hear. I learned how to present decisions to her so they weren't overwhelming, but not influencing, either. By the end of this project she had figured out a direction and knew exactly what she wanted. It's going to be fun seeing what she does with it from here.
The other houses are a bit neglected at this point. Our main residence really needs exterior paint, bathroom remodels, new carpet. The beach house will slide off the bluff soon thanks to industrious ground squirrels unless I build a retainer. Our tenants at the cabin want a laundry room built. What's missing though is any sort of deadline. I can go to Patrick's soccer games. I'm going to become a familiar face at church again. Lauren needs driving lessons. McKenna needs college funding and the overtime's available.
Speaking of funding---when I go back through bank statements it's astounding what it costs to buy a house one piece at a time. More often than not, I'd stop at a hardware store on the way home from work and spend a few hundred dollars. The expense of owning this house is now down to upkeep, utility bills, insurance and taxes.
The one thing we didn't backburner through all this was date night. AM and I have always made date night a priority. Next date night, though, won't be a trip down the hill---it'll be right across the street at her new cottage.
Wednesday, November 14, 2012
Monday, November 12, 2012
Building Bridges
The final project necessary for completion before the final inspection is the bridge to the porch. I'd thought about where it would start, where it would end, and how it would be shaped for many months. Lately I'd been waffling about how complex to make it----I could do a 'just get it done' design of a couple steps down to dirt in a few hours. I talked myself out of that though.
Here's the difficulty---I wanted the bridge to curve, going uphill, on an off-camber slope. So I started by digging two footings down to the hardpan, at angles to each other. I poured concrete in those with lots of rebar and bent rebar from one to the other so the finished bridge would be well anchored. then I figured out the midpoint between the two and put a 40" board on the ground there, and dug it in and wedged it until it was level. Then my forms were built from each footing to that board. The 'joists' were in first, then the form boards on top were just set on them (with angles ripped so they'd fit tight like a barrel) Then I scribed a line on those that followed the curve I wanted, cut them and screwed them down---with screws just long enough so they wouldn't move. I knew I'd have to demolish my forms from underneath so shorter screws made sense.

 I'm kind of wishing I took more pictures of forming the bridge now. Anyway I watched the arch curve towards the porch. The trick there was forming it so it didn't push against the porch beam, making removal of the form impossible. I screwed it down from the top with a 2x6 that also served to form a pocket for the first deck board to rest its edge in. Bending the plywood and screwing it into the bridge form was hard. Then large stones got mortared against the forms. I decided not to use stones on the edge of the bridge itself---I wanted it pretty thin and thought the stones would weaken it too much, so I just colored it instead. Worse thing was, it started raining while I was mixing.
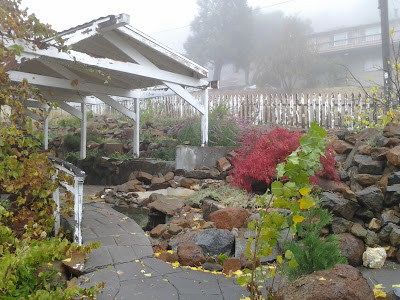 This picture made its way in here for a couple reasons. It's the first curved bridge I did, over our fishponds. Also you can see what the weather was like. Also to prove SoCal can get fall colors. Also you can see the neglect our pavilion and fence have faced since I've been building. (The cottage project is across the street, behind this pavilion. You'd see the roof but for the fog)

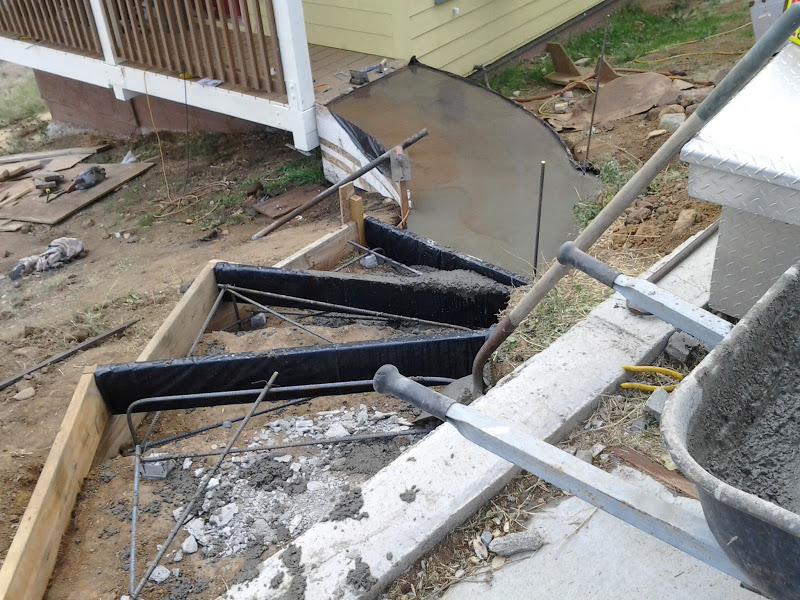
The rain didn't ruin anything---it just made the surface rough, not a bad thing for a foot path. You can see the color mixed in so it'll match the hearth inside. Although I milked it with AnnaMarie, it was actually great weather to mix concrete in----hot and dry is far worse, lugging 90# sacks of concrete, breathing the dust, and misting the stuff that's already mixed so it doesn't dehydrate too fast.


 The wooden box things are forms for the retaining wall. It will look just like the ones in the backbround with native stones between the pillars. This will form a planting area next to the walkway.
Here's the difficulty---I wanted the bridge to curve, going uphill, on an off-camber slope. So I started by digging two footings down to the hardpan, at angles to each other. I poured concrete in those with lots of rebar and bent rebar from one to the other so the finished bridge would be well anchored. then I figured out the midpoint between the two and put a 40" board on the ground there, and dug it in and wedged it until it was level. Then my forms were built from each footing to that board. The 'joists' were in first, then the form boards on top were just set on them (with angles ripped so they'd fit tight like a barrel) Then I scribed a line on those that followed the curve I wanted, cut them and screwed them down---with screws just long enough so they wouldn't move. I knew I'd have to demolish my forms from underneath so shorter screws made sense.


The rain didn't ruin anything---it just made the surface rough, not a bad thing for a foot path. You can see the color mixed in so it'll match the hearth inside. Although I milked it with AnnaMarie, it was actually great weather to mix concrete in----hot and dry is far worse, lugging 90# sacks of concrete, breathing the dust, and misting the stuff that's already mixed so it doesn't dehydrate too fast.
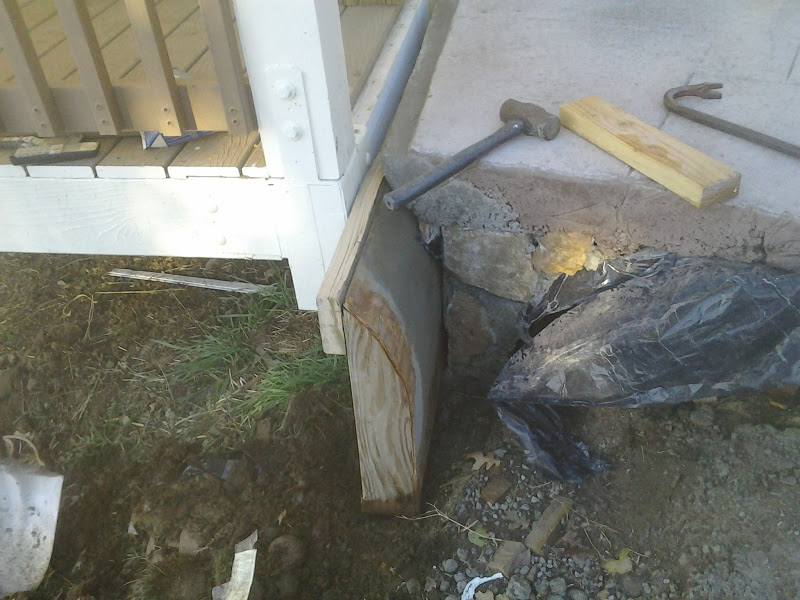
So this is stripping the forms. This one was pinned to the ground with lag bolts pounded in from under the deck. Wedges from underneath kept it off the beam, and that 2x6 screwed from the top kept it away too. You can see how the deck board will drop right in there. It's a smooth transition from concrete to deck. After pulling the pins out, it just got pounded out from the other side. The main bridge form, I just kept whacking the joists to smithereens with the digging bar. Once one form board came out the rest just fell. (The whole thing was lined with plastic for a smooth finish and to help with this stage)


Monday, November 5, 2012
More Finished Stuff
Here's a better pic of the bedroom floor, all finished except for the brown caulk that will go in all the seams---I'm saving that for an after dark project now that it seems to be night right after lunch
 Same deal with the staircase. All done except for caulk---I want a bead of caulk in all the corners so when I sweep the dirt can't jam under the little crack
 The ends are all trimmed with jacareuba. I really wanted to make the treads out of jacareuba but I couldn't cut boards big and flat enough---after ruining the bearings on a friend's band saw, I ended up with enough for the landing, I'll have to settle for that
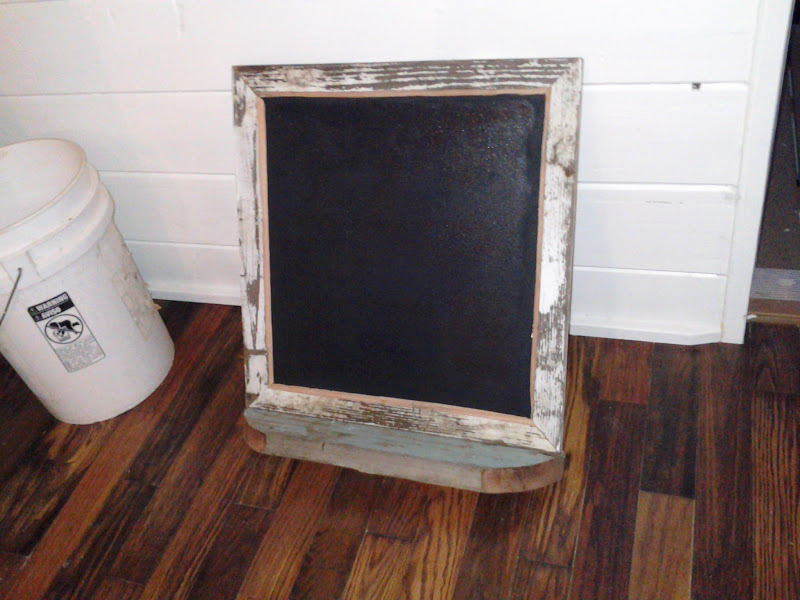
 AnnaMarie wanted a chalkboard for the kitchen. She knew what she wanted and we couldn't find it anywhere, like the bedroom floor. She wanted something framed with 'old white paint'. I bought the chalkboard paint----if you ever use that stuff plan on three coats minimum sanding in between
 I went down to the lake and crawled around under the 120 year old boat house and found this 4x4 lying on a stack of old wood. AnnaMarie did the chalk paint, and decided she wanted a couple of the inside of the tallest cabinet door chalkboard too to keep a grocery list. So I decided the inside of one of the doors for the liquor cabinet should be chalkboard too.


Saturday, November 3, 2012
A Smart Foreperson
AnnaMarie's cottage has to be completed by November 20th or the permit expires. I made trades at work to have a bunch of days off in a row---only to get called back to work for a bit. Two things left to finish for the final---the concrete bridge to the front porch and all the cleanup of the site. No problem!
Except----AnnaMarie said to get all the little finish stuff inside done first. Base moulding, door handles, little trim pieces, etc. Biggest was the bedroom floor. I think she knew once I had the final inspection in hand work would slow WAAAAYY down. Smart.
Choosing the bedroom floor was a struggle. The rest of the house has that 40+ year old solid oak we found for next to nothing on Craigslist, so to drop Ikea Tundra floor in the bedroom would have looked cheap. We had two trips down the hill to look at different floors. The ones she liked were dark gray with some brown, and were about $7 a square foot, and she didn't really love them, they were just O.K.
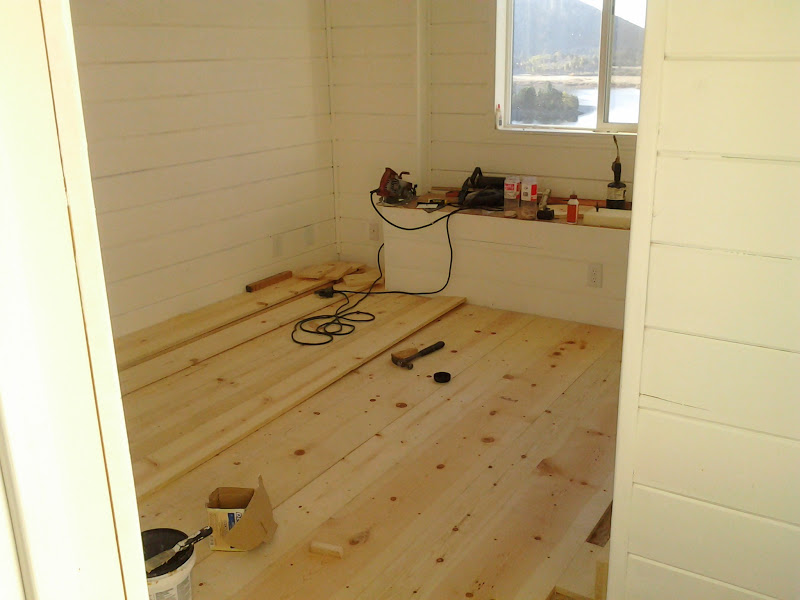
The bedroom isn't a main thoroughfare so walking traffic is light. I thought we might get away with using a softwood so I bought three different widths of white spruce and let it acclimate for a week. First it got cut to size then biscuit joined to the next board---this will prevent cupping over time.
 Next, it got a good sanding since each board was a little different thickness. The boards were glued down with heavy duty construction adhesive then screwed down tight. AnnaMarie filled all the screw holes while I got the base moulding cut to size.
 The slight gaps are unavoidable. They get filled with flexible caulk after the varnish cures. Since she wanted a gray floor with brown in it, I burnished the whole thing with a propane torch and simultaneously confirmed proper operation of the smoke detectors.
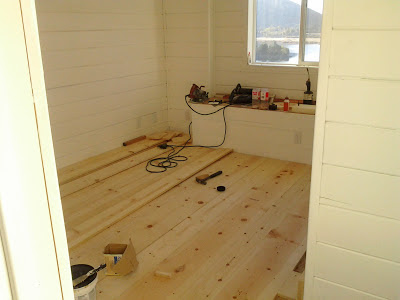
 Then the stain. I used Minwax ironically labelled "New Color! Classic Gray". It was allowed overnight to dry...(Sidenote---I started at 05:30 am on Halloween and finished the staining at half past midnight, listening to 'Coast to Coast' Halloween ghost story special. Her cottage is the exact opposite of a creepy mansion so it was impossible to get freaked out) then varnished with a semi-gloss, then sanded, and re-coated. This pic is between coats so the finished product is a little smoother and shinier and the roller marks all blended in---I'll post a finished picture later.
 AnnaMarie painted up the base mouldings too and I'll install that tomorrow when I get home from work. So I finally got a day to just dig for the bridge and footpath. AnnaMarie and Lauren gave the inside a much needed wipedown and cleanup, and when it got dark and chilly I didn't want them to go home because I appreciated the company so I got a fire going.

Except----AnnaMarie said to get all the little finish stuff inside done first. Base moulding, door handles, little trim pieces, etc. Biggest was the bedroom floor. I think she knew once I had the final inspection in hand work would slow WAAAAYY down. Smart.
Choosing the bedroom floor was a struggle. The rest of the house has that 40+ year old solid oak we found for next to nothing on Craigslist, so to drop Ikea Tundra floor in the bedroom would have looked cheap. We had two trips down the hill to look at different floors. The ones she liked were dark gray with some brown, and were about $7 a square foot, and she didn't really love them, they were just O.K.
The bedroom isn't a main thoroughfare so walking traffic is light. I thought we might get away with using a softwood so I bought three different widths of white spruce and let it acclimate for a week. First it got cut to size then biscuit joined to the next board---this will prevent cupping over time.


Subscribe to:
Posts (Atom)