As soon as I got the insulation in, it rained HARD. So before we left for Temecula I took off all the plastic wrap and left the batts loose to dry out.
With the insulation in place, it's time for the floor tongue-and-groove panels. They're 1" thick. Construction adhesive avoids a squeeky floor later. After the panel's in place it's nailed down.
You always put the panels down so the groove side is out; that way when you beat it into place with a block of wood and a...persuader, you don't mess up the tongue.
A perfectly aligned and installed subfloor can be tested by seeing if a soccer ball will levitate without moving over any given spot. Here, Patrick is amazed by the results.
I gotta go to work for 48 hours and more rain is coming, so I put down plastic sheeting. I'll just frame over it and cut it away later. It's really exciting to be framing. You can see where the plumbing and electrical come through .
Friday, October 29, 2010
Tuesday, October 19, 2010
Floor Framing, Rough Plumbing
Got past a major hurdle---the rough plumbing and floor framing inspection. There were quite a few little things I was concerned about. The inspector didn't share my concerns. He was very complimentary....The rough in plumbing had to be temporarily extended up 10' , then an inflatable plug put in the lowest point of the plumbing, then the whole thing filled with water to check for leaks. (The plug is called a 'weenie'. I'm going with large piping so I never have to worry about drain problems...Turns out a 4" weenie is hard to find. My brother Jim was with me as we went around the plumbing supply place, and had to inform the owner he didn't have a weenie big enough) Fortunately a plumber at the shop sold us his well used weenie for half price. (Oh grow up)
The inspector was very impressed with the framing progress. Now the most fun stage starts. First some strapping (I'm using scrap OSB) goes under the joists perpendicular, then the 14" batt insulation goes in. Then I can put down the subfloor. Then I get to start framing. THAT is the most fun stage of the whole project. I just wish it were Spring instead of early winter.
Wednesday, October 6, 2010
The Modelling Gig
Mike (my old partner on HazMat, pre-helicopter) and I got a job for the last 5 days working for DuPont. There's a huge Safety Council convention in San Diego right now, same place they hold ComiCon.
I only got pictures of Mike. Once the demonstration begins there's no one to get pictures...We were demonstrating the superiority of Tyvek suits compared to SMS suits, doing a '16602 test'. Every half hour or so, a DuPont guy would start talking and gather a crowd. I would be there with him while he explained 'Two actual San Diego Firemen' were helping them with the test...We both had on paper suits that were very absorbent. Mike had the SMS suit on over that, I got the Tyvek suit over mine. He'd get in the chamber first and march in place for 60 seconds, slowly turning 360 degrees, while 5 nozzles sprayed water with black dye in it at him. He'd get out of the chamber and disrobe in front of the crowd, showing how much permeation there was. Then I'd get in the chamber and do the same test. When I disrobed, my undersuit was spot free.
Really, I offered to be the dirty suit guy every day, but Mike refused. So I had the easier of the two jobs and got to stay mostly dry. At the end of each day there was lots of scrubbing of the chamber to do.
The pay was really good. The weather has been wet and rainy so I can't work on the new place anyway so this timed out perfectly. I'm kinda glad it's done---it's true what your hear. The glamourous world of modelling is a lot of work.
Monday, September 27, 2010
Nature Trail To Hell!
We've been planning this ride for some time...Recently AnnaMarie and I were at the Ocean Beach street fair and saw this poster. I stopped to try to figure out where it was exactly. The lady selling the poster and matching t-shirts knew what I was trying to do and said, "C'mon, you can do it; you'd be the first!"
I realized it's exactly where we planned on ending the ride, right where Highway 78 'T's into Highway 86 at Salton Sea.
58 miles, starting at my house at Lake Cuyamaca (elevation 4800') ending at this sign (elevation 227' below sea level). October 16th. We will leave early morning; if you want to get here the night before and carbo-load, great!
What You Need--- 1) A bicycle (duh) 2) Sustenance 3) Spare inner tubes 4) A good attitude. We will leave cars at the endpoint and drive up the road a few miles to one of Mike Friese's Salton City homes for a victory BBQ.
What We Need--- 1)A chase driver. There must be somebody wanting to participate but not wanting to pedal. 2)Hot chicks to staff the victory BBQ. AnnaMarie's the first volunteer meeting all requirements. 3)A cool t-shirt would be good
Other info---this is a fun ride intended for non-riders. Not a race. Anyone that wishes to bail and ride in the chase truck will be welcome to do so. Alternate plan for the ride if the Santa Ana's are blowing (a headwind would be unfun) we'll go the opposite direction to Mission Beach.
This is a not-to-miss event. Celebrity bicycle mechanic James L. Vandewalle will be coming from NorCal at great expense to participate.
Back to the lady with the poster--I may be getting this wrong but I think she said her husband, who is going blind, took this photo and they are selling the posters/shirts as a fundraiser and awareness raiser for blindness. If there's interest, I'll contact her and see about buying her shirts with this image
Saturday, September 25, 2010
Smaller Beams
Perfect combination of good weather and days off and a minimum of other have-to-do's makes for some good progress. You can kinda see why the big beams went the way they did. The heavy timbers are where the wrap around deck is. You have to have a minimum 1" step down from inside to outside. The interior framing is 2" higher than the exterior since the decking is 1" thick.
The part with the funny angles is where the bay window will be. It's cantilevered out like the deck. It's about 6' off the ground already, and there's two stories to go---this is going to be a tall and skinny house!
I'm learning to really like the I-joists. They are perfectly staight and very stiff and light. The hangars go in pretty quick then you cut the joists to size and they just snap in. I made the mistake of pre-staging some hangars upside down over some already installed joists. The vibrations from pounding made them settle down and clip themselves in. They don't come off easy...Oh well, lessons learned. The part that isn't done yet is where I have to do the rough-in plumbing. I'll hang a few of the joists so I can hang the drainpipes from them but still move around without having to crawl underneath a completed floor---one of the advantages of doing everything myself is planning steps out like that.
The floor frame is very sturdy, even before the subflooring is down.
Sunday, September 12, 2010
Big Beams
With a few days off in a row, lots of work can get done. There was a bit of a delay (again) caused by suppliers---I wanted the sill (the pressure treated lumber the house sits on) to be splice free. I made a special trip to buy a 3x6x 20'; got home and noticed it was only 16' long. How do you not notice 4' of board missing?? Then, what was really frustrating, the metal column caps (that's the piece where the beams intersect) were all custom special order. The supplier called saying they were in; I made the hour and a half drive to Escondido, only to find out my order WASN'T in, they were looking at a different order.....
Finally with my last day off I had all the parts and a whole day to work. It was a bit scary getting the big beams from here to there but it all worked...It was really enjoyable to be working with big lumber on land I own on a beautiful day---until my sports-freak neighbor came up and really scolded me for missing Patrick's soccer game.
It may look like I have beams going every which way. I do. Since I really wanted the deck to wrap around two sides, and the new fire restrictive codes don't allow for stacking cantilevers, this was the solution. There are still a few more big beams to put in, then the rough in plumbing; then I'll be ready for the next inspection.
Friday, September 3, 2010
Cost Of Doing It Right
When you decide to build something, you have to decide what kind of builder you're going to be. You can be the kind that does it as cheap as possible. You can just do what it takes to get something up, or you could design based on your current skill level. I'm of the opinion you draw up exactly what you want to end up with and figure it out as you go.
Now that the foundation is done, I'm installing the sill plates---the pressure treated lumber that sits on the foundation, and the whole house rests on these plates. Well, this lumber was at the very bottom of the wood pile, so I had to spend time moving things up to the lumber rack. It gave me a chance to figure out what was what. There are some parts missing.
I wanted a deck that wraps around two sides of the cabin. The normal way to do this is to have some heavy timbers stick out (cantilever) one direction, then have the floor joists on top of those timbers, cantilevering out in a perpendicular direction. Problem is with the new fire resistive construction you can't stack exposed framing members. Eliminating the deck on one side would be the easy thing.
Instead, I have very heavy timbers (they are the 6x12's wrapped in white paper) that sort of herring-bone pattern off each other, with the joists hung between them. Added bonus--the overall elevation of the house is 14" less. However, I have to support two heavy timbers on the outside floating edge of these beams, and there's a 6x6 post at each junction that will support the porch roof. All this requires some very beefy steel hangers. They are custom order items. If you look at the picture, you have to imagine it inverted, and the post straps are used instead to hold the 6x6 columns.
I need 6 of these. Not all the same. Some of them are $228 EACH! Whoa. Not in the budget, but there aren't options. I ordered them; they come in Thursday.
So, instead of framing, I'm picking up overtime shifts (always available in the Summer) and a modelling job that will pay 'several hundred dollars' a day for four days, which should just cover the expense.
Delays, Delays!
Wednesday, August 25, 2010
Tidying Things Up
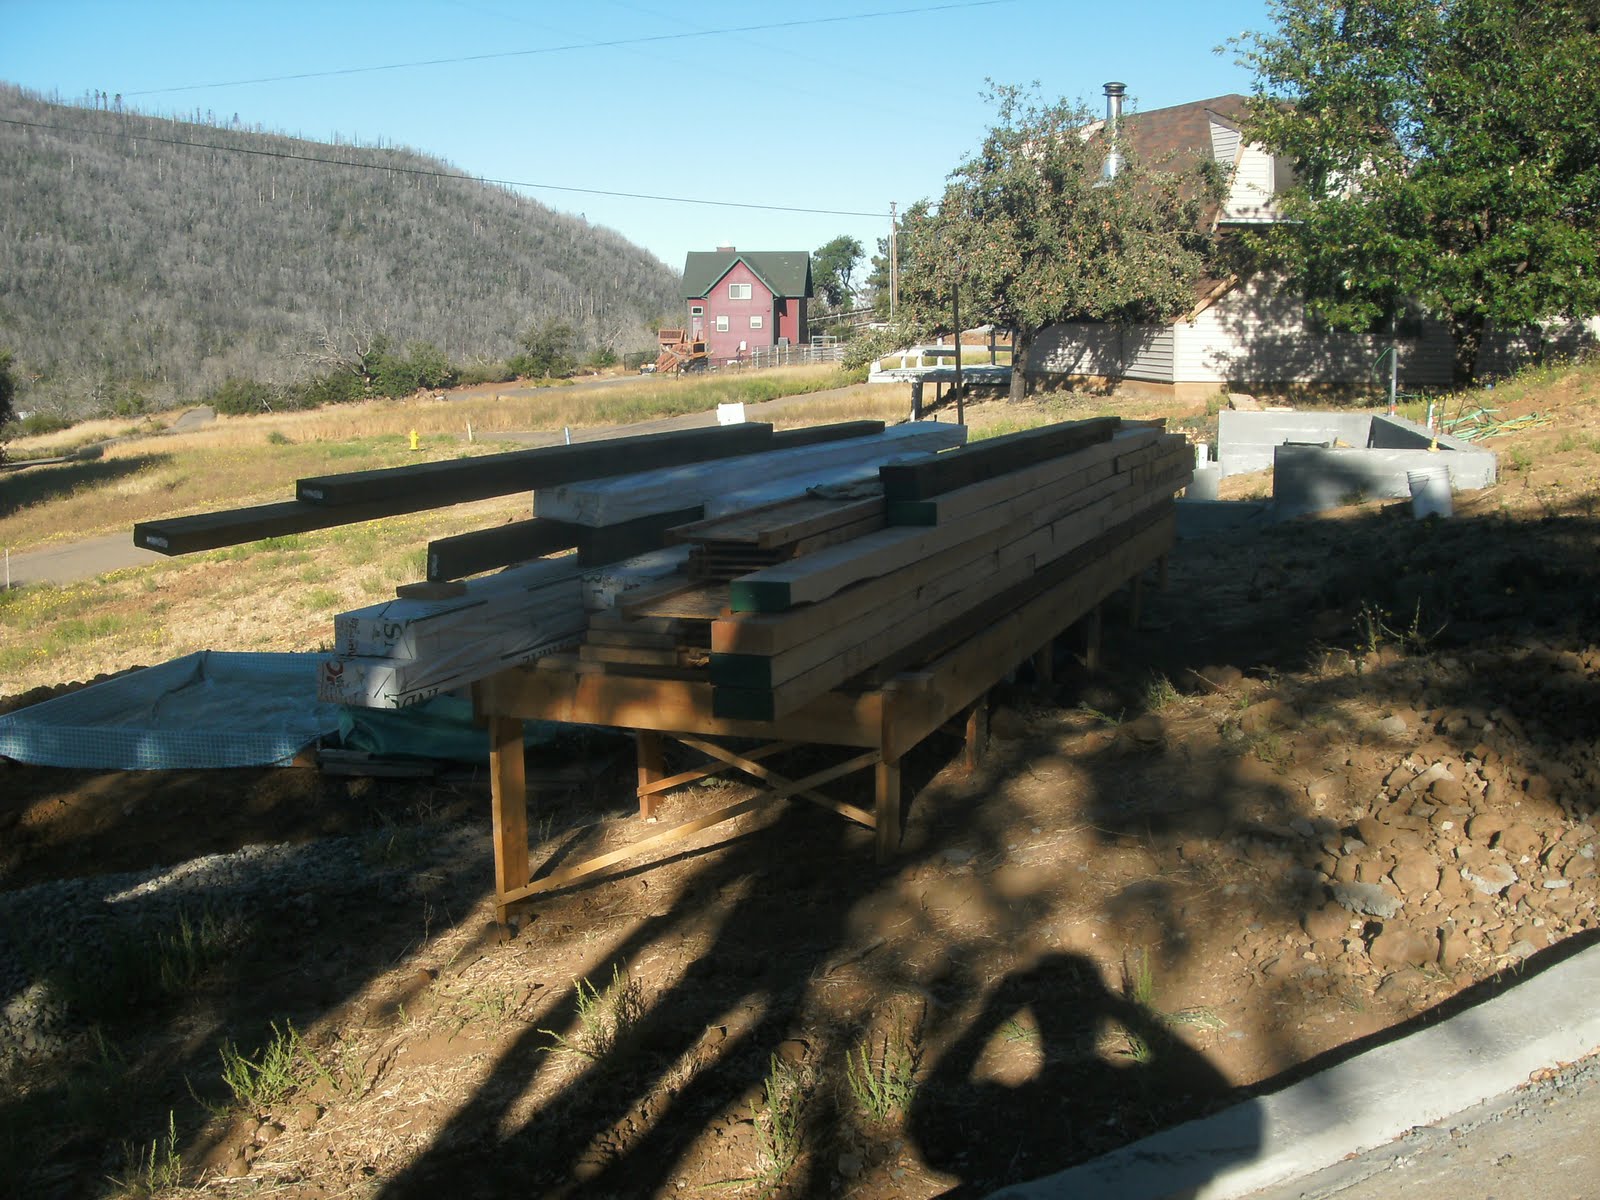
Things were looking kind of junky around the lot after stripping the forms. I need to get to some specific pieces of lumber next, and they are buried underneath some big beams that I'd rather not move twice. So the bigger boards (that started life as driveway forms, then were re-used as foundation forms) became a big lumber rack. It's going to be nice having a big flat area to stage lumber, and even make some cuts. A lesson learned from before was, working on a slope slows everything down. Having a flat surface to measure and cut on is worth a day's work....When the framing is done this lumber rack will be re-re-reconstructed as a steep staircase to the roof for that stage of the project
Monday, August 23, 2010
Building My Own House
Once again, a neighbor asked when I'm gonna start building. I wanted to tell her I'm almost finished----plans are approved, utilities are all in, materials are delivered, and foundation is done.
Foundation's DONE! I've been fantasizing about this point for two years now. It took two months to dig then form the foundation. It took two hours to pour it. It took two days to strip the forms.
One of my volunteers (Kieran) was tasked with dumping the color (iron oxide, mostly) into the forms while we worked the concrete in. I wanted it to look somewhat like the surrounding boulders---it doesn't, but it's still better looking than plain concrete. I kinda like how it turned out.
Stripping the forms wasn't easy. First I took out all the screws that I could get to; many of them faced inward so it took some prying and breaking to get everything apart. Then the task of peeling away to fabric and cutting it. Very dusty work---didn't help allergies at all. Oh well---I'm out of the dirt now and can start with the wood stuff now! Next up is the rough floor framing inspection
Monday, August 16, 2010
The Big Day
_
Yesterday everything (forms, digging, housework, cleaning the cabin) finished around 10:00 pm. Byron got here around 6:30 this morning. We started actually pumping and pouring about 7:00. Other volunteers showed up--Butch Paddock (neighbor) and a few co-workers from HazMat---Kieran and Steve (Mike showed up after all the work was done, just like a blister. He still got a grilled sandwich but had to eat the heels)
After months of prep work, it was only 2 hours of pouring. It got to be a juggling act because the concrete was setting quick in the heat. The forms didn't move a bit, and we had exactly the right amount of concrete.
We had lunch and hung out for a bit. I have to go wet it down, then I'm going to lie down for awhile
Last Minute Prep
So, a full load of concrete is 9.5 yards. I need 14.5 I figure for the foundation. The biggest expense is the delivery charge, so ordering a short load doesn't make sense.
So, I decided it was worth shaping and forming the rest of the driveway, enough to eat up another 4.5 yards. It's hard pan dirt and needs to come down about 8" in some spots. Racing the sun but got it done in time to get some rebar down.
Subscribe to:
Posts (Atom)