Wednesday, September 26, 2012

Jacareuba

   So in the saga of the mystery lumber, here's an update.

   I found out the wood came from Belize and was left over from when the schooner 'The Californian' was built 30 years ago.  I wrote to a guy who has a company that logs the riverbeds in Belize, and he immediately identified the wood as 'Jacareuba', also known as Santa Maria.  I really wanted to build the stair treads from it.  I took some of the remaining beams to a fire captain I worked with years ago---he has a brand new band saw that was big enough to cut the stuff.


This is Capt. Martino nad his bandsaw.  We got through about 7 cuts before we fried the bearings that guide the blade.  The cuts weren't really flat enough for stairs, and to run it through the planer you had to run it through the joiner first, which is limited to 8" wide.  We ended up with enough to do the stair landing at least.  I have to buy him new bearings now.
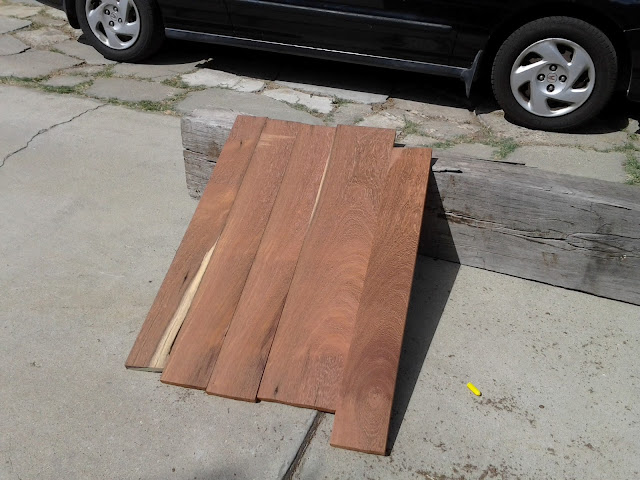
Here's most of what we produced that day, leaning against an uncut beam.

In the process of researching 'The Californian', I came across a high end model ship building company in Westminster.  I wrote to them and asked if they wanted some of the cut-offs.  'The Californian' is one of their models and they boast about attention to detail, so I thought it would be cool if they could build their models of  'The Californian' out of wood from the original.  The owner immediatly wrote back with a 'Hell yes' and 'How much do you want?'  (I told hime I'd do it for the cost of shipping.  I got the wood for free...I'd also appreciate a picture of a finished product using it)
The Californian....She's docked at the San Diego Maritime Museum.  She's the official tall ship of our state and the replica of a schooner that patrolled our coast.  The figurehead for The Californian used Chritine Bach as the model---(unfortunatley without the daisy duke shorts) as she is descended from people that crewed the original schooner. 

Friday, September 14, 2012

Home Built Cabinets

   There's a guy who reads this that, over a year ago, asked me how I build cabinets without a workshop.  I've never posted this many pictures but I wanted to show step by step.

 1) Figure out your dimensions.  Cut a piece of 3/4" plywood the height of the cabinet, and double the width---plus at least 1/4".  Use a router (if you're lucky enough to have a table saw with a dado blade you probably know more about building cabinets than I do) to cut a track everywhere you want a shelf, and the bottom, and the top.

I just clamp my 4' level for the staight edge guide...Here's why you made the plywood piece twice the depth of your cabinet-----


Now you can cut it apart intot he left and right sides and the kerfs will match up perfectly.  With a steady hand and a skilsaw you don't really have to have a table saw.  Run both sides through so they are the same (that's why you added at least 1/4" , to make up for the saw blade kerf)

  Whatever material you're using for the back, cut a rabbet along the back edge.  I found some 3/16" luann for $6 a sheet so the rabbet is 3/16" deep.
  Drill a little pilot hole every 6" through all the grooves, then again from the other side with a countersink bit so your assembly screws can be covered with wood fill later.  Now you can assemble the carcass.

  It's easiest if you clamp it together a little loose so you can tap the shelves into place.  If the shelf won't have a face frame across the front of it it's a good idea to use some iron on veneer so it will take paint better than a cut plywood edge, so tap the shelf back away from the sides whatever the thinckness of the iron on stuff is---abuot 1/32".

  You probably don't need giant holes in your shelves.  This cabinet holds the range hood and the holes are for the vent chase and the power cord.
   Flip the carcass over and measure the height and the distance between the left and right rabbets.   Cut your backing material accurate and square---this is when you square up the carcass,  Nail it along one edge, then just force the carcass in line with a perpendicular edge.  Mark where the shelves are and nail it there, too.  If you have to cut out for plumbing or electrical, just bring that backing inside and mark and cut now, then put it on.
  Here's the one special tool you gotta get---a Kreg jig.   It's a pocket drill guide with a special two stage bit, and a clamp that holds pieces of the face frame in place so you can screw them together.  There are little kits that are just dowels and this little metal thing you put in the hole you drilled that marks the mating board, but they never quite line up.
      Here it is all done with the face frame nailed on.  AnnaMarie really likes the re-puposed pallet look (I wouldn't use pallets---so loaded with insecticide and fungicide) so I bought cedar fence pieces and cut them to do a crate-look veneer on all the parts that show.  They'll get painted a gloss white.  Lining up the vents while installing the cabinet was....fun.  Not.
 

Wednesday, September 12, 2012

Light Duty


     AnnaMarie couldn't find pendant lights she liked for over the bar.  We had fun looking online but still couldn't find what she wanted.  I was at Dixieline and they had the pendant light hardware (you buy the globe and bulbs separate) in the bargain bin for $6 each.  I guess the antique bronze doesn't sell. 
     I have a special diamond tipped drill bit.  You have to keep it wet or the glass shatters.  A.M.  had a pair of hand blown olive oil bottles she decided would work well.   It would have been easy to just cut the bottoms off but she wanted the thick glass ring at the bottom.
    Glass, power tools, water.

        The neck on the bottle was too long, so the bronze cap wouldn't cover it and it looked stupid.  So the wetsaw I used for cutting rocks was put back in service.
      More glass, power tools, water.  And a camera.
                           All the sharp edges were sanded under water.  I wouldn't want anyone to get a cut when changing the bulb.  It was a bit tricky getting that nut on and tight.
                 All done.  We tried a variety of bulbs.  These have a sort of crackly glass.  40 watts and pretty bright----I might go down to 25 watts.
  AnnaMarie doing some finish work in the reading nook.  The balusters are made from that mystery wood----I had just enough.

Friday, September 7, 2012

Getting Close

    I was coming up on 180 days since the last inspection.  I've got a whole bunch done in that time, but nothing completed.  So I asked Rob (my building inspector) to do a progress inspection.  I was at work but AnnaMarie dealt with him just fine.
    Rob put together a list of everything to do before my final in November.  There were only two surpises---

  He said my stair rail was too high over the nose of each tread.  What he didn't account for was, I haven't added the treads yet---it will add 1" of thickness, plus the nose will come out another 1 7/8"---well into the correct height.
  
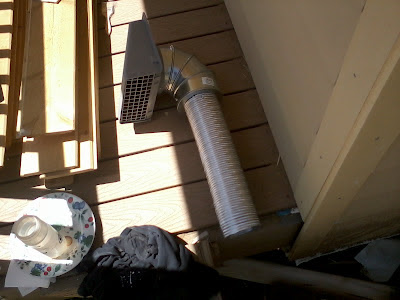
  He said I can't use corrugated tobing for the range hood vent.  It has to be smooth walled rigid pipe so grease won't accumulate.  Getting the flexible stuff in was hard enough.  The rigid stuff is going to be a real challenge.

     The floor is all finished----I had to let it dry for a few days, sand it, and put another coat down.  A.M. wanted the upstairs planking to go perpendicular to the downstairs, and after it was in I could see why.  I have to get a picture of that.

   This was early on in the finish process but gives a good idea of raw vs. finished.  I absolutely love this floor and it was only $120 for all the downstairs and upstairs minus bed and bath rooms.

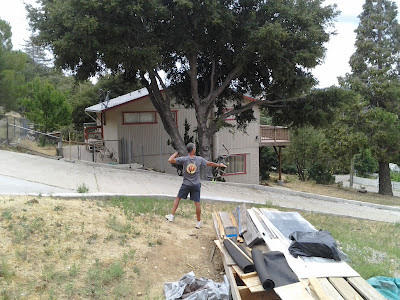
   There have been a few interesting things to look at while building.  Here's my neighbot Jene doing some target practice.  His target is across the street way down the meadow, maybe 150 yards.  He doesn't miss.

Then, there are the Chubascos.  Chubascos are the clouds that form right over our mountain ridge where the cool moist ocean air slams into the hot dry desert air.  This cloud dumped 5" of rain in a few hours.